
Commercial kitchen ventilation is a coordinated system, not a single appliance: hood, grease filters, ductwork, exhaust fan, makeup air, and fire suppression all have to work together and be balanced to meet IMC and NFPA 96 standards. Getting the hood type, airflow sizing, and interlocks wrong is the single most common cause of permit rework. The practical first step for any owner or facility manager is engaging an MEP/FP engineer to review the design and produce the balance report before construction, not after.
TL;DR:
- Proper design must coordinate hood type, airflow sizing, and interlocks before construction, as incorrect choices cause most permit rework issues.
- Grease duct construction requires continuous welded seams, accessible inspection panels, and verified clearances to prevent slow grease migration that can lead to fires.
- Fire suppression systems must activate in sequence to shut off fuel and power, with regular inspections and documented interlock testing; missing or mismatched components delay permits.
- Retrofitting an existing kitchen involves careful phased work, verifying existing duct sizes, and replacing equipment with proper documentation to avoid costly mid-project surprises.
Table of Contents
- What Makes Up a Commercial Kitchen Ventilation System?
- Type I vs Type II Hoods: Which Does Your Kitchen Need?
- How Do You Size Exhaust CFM and Makeup Air Correctly?
- Grease Duct Construction: What to Verify Before Concealment
- Fire Suppression and Interlock Requirements You Can't Skip
- Keeping the System Running: Maintenance and Performance Checks
- Which Codes and Permit Documents Actually Matter?
- Bazini Engineering's Design Review Checklist
- Why Noise Control Matters as Much as Airflow
- Common Installation Pitfalls That Delay Occupancy
- How Do You Verify a System Is Actually Balanced?
- Why Ventilation Effectiveness Is a Safety Issue, Not Just a Comfort One
- Retrofitting an Older Kitchen Without Shutting It Down
- Prioritize the System, Not the Symptom
- Get an Engineering Review Before Your Next Permit Submittal
- Sources
What Makes Up a Commercial Kitchen Ventilation System?
A functioning system has seven parts, and each one only works if the others are sized correctly around it. Think of it less like a fan bolted to a hood and more like a circulatory system: air has to come in somewhere close to where it leaves, or the whole kitchen fights itself.
- Hood: captures grease, smoke, and heat directly above the cooking line.
- Grease filters: baffle or cartridge filters that pull grease out of the airstream before it reaches the duct.
- Ductwork: carries exhaust from the hood to the exterior, built to grease-tight standards.
- Exhaust fan: pulls air through the system at a rate matched to the hood's listed CFM.
- Makeup air (MUA) unit: replaces the air the exhaust fan removes, often tempered to space temperature.
- Fire suppression: a wet-chemical system tied into the hood and duct for grease fires.
- Controls and interlocks: the wiring and logic that force MUA and exhaust to start and stop together, and that shut down fuel or power if suppression activates.
The concept engineers call "capture and containment" is what separates a system that works from one that just moves air. If the hood pulls harder than the makeup air pushes back, you get negative pressure that drags conditioned air (and sometimes fumes from adjacent spaces) through doors and cracks. If MUA dumps cold or unfiltered air directly into the capture zone, it can disrupt the thermal plume rising off the cooking surface and push smoke back into the room instead of up into the hood.
When a contractor hands you a proposal, ask for three things in writing: the exact filter type and its listing, the fan's selection curve at your actual static pressure (not just a nameplate CFM), and the MUA tempering strategy relative to the hood's discharge pattern. A vague answer on any of these is a warning sign.
Type I vs Type II Hoods: Which Does Your Kitchen Need?
The dividing line comes down to grease, not heat. IMC Section 507.2 requires a Type I hood over any appliance that produces grease-laden vapors or smoke, including fryers, char-broilers, griddles, and most ranges. Type I hoods must include grease filters and are almost always paired with an automatic fire suppression system.
Type II hoods are for heat and steam only, appliances like dishwashers, steamers, and ovens that don't produce grease. No suppression is required, and construction tolerances are looser, which is exactly why some owners try to save money by installing one where a Type I belongs. It doesn't hold up under inspection, and it's a genuine fire risk.
When reviewing drawings or an installed hood, check these details:
- Steel gauge: grease duct and hood bodies typically require 18 gauge carbon steel or 20 gauge stainless steel minimum, per NFPA 96.
- Seams and joints: continuous liquid-tight welds, not sealant or rivets, on grease ductwork.
- Clearances: minimum distances from hood edges to combustible construction, verified against the manufacturer's listing.
- Overlap at the appliance: the hood must extend past the cooking equipment on all open sides by the code-required margin.
Pro Tip: If a menu changes and someone rolls a charbroiler under a Type II hood "temporarily," that's a reclassification trigger. Flag any equipment swap to your engineer before it goes live, not during the next inspection cycle.
How Do You Size Exhaust CFM and Makeup Air Correctly?
Exhaust volume gets sized off the appliance's heat output and duty classification, not a rule-of-thumb number pulled from a similar kitchen down the street. Engineers group appliances into light, medium, heavy, and extra-heavy duty categories based on how much grease and heat they generate, then calculate required CFM per linear foot of hood using the applicable duty class and hood style (wall-mounted canopy, island, or backshelf all pull differently).
Most single-hood systems in a full-service kitchen require exhaust volumes per linear foot that depend strongly on the duty class and hood configuration; any specific number quoted without detailed calculations should be considered a placeholder rather than a final design value.
Code guidance requires demand control kitchen ventilation, or DCKV, on systems exceeding 1,000 CFM. DCKV uses temperature and optical sensors to throttle the exhaust fan down during low-cooking periods instead of running at full volume all shift, which is where a lot of the energy savings in a retrofit actually come from.
A few things worth nailing down at the design stage:
- Makeup air must be tempered within 10°F of the kitchen's space temperature, per the same code guidance.
- MUA distribution should avoid dumping directly into the hood's capture zone, which disrupts the thermal plume.
- Systems over 1,000 CFM need variable-speed control or DCKV, not just a bigger fixed-speed fan.
- A formal balance report, with exhaust and MUA calculations, is a standard permit deliverable, not an optional extra.
Ask your engineer to hand you the balance calculations before construction starts, not as a closeout document. Fixing an undersized MUA path after the ductwork is closed in costs far more than catching it on paper.
Grease Duct Construction: What to Verify Before Concealment
Grease duct failures rarely show up as a dramatic leak. They show up as slow grease migration into a wall cavity that nobody notices until a fire marshal or an insurance adjuster does. Municipal design guidance is specific about what should be on the drawings and verified in the field before anything gets closed in behind drywall or a chase.
- Welded seams: all joints on grease duct must be continuously welded and liquid-tight, per design guide requirements.
- Access panels: hinged inspection doors are required at horizontal duct runs and direction changes, spaced per code, so cleaning crews can actually reach the interior.
- Roof termination height: exhaust outlets need minimum clearance above the roof surface and from adjacent structures or intake vents.
- Light testing: before a duct run gets covered, a light test (shining a light inside with the duct dark) confirms there are no gaps in the welds.
- Clearance vs. wrap: grease duct near combustible construction either maintains a minimum air clearance or gets wrapped in a listed fire-rated enclosure, and either method has to be documented for the inspector.
Grease-mitigation technologies, electrostatic precipitators and catalytic pre-treatment among them, can extend the interval between full duct cleanings by capturing more particulate at the hood before it ever reaches the duct interior. That doesn't eliminate the inspection schedule; it changes the frequency conversation you have with your cleaning contractor.
Fire Suppression and Interlock Requirements You Can't Skip
NFPA 96 requires automatic wet-chemical fire suppression on every Type I hood, and the system has to do more than just discharge chemical onto a fire. It has to shut things down in a specific sequence.
- Suppression activates and discharges wet chemical over the hood, plenum, and duct.
- Fuel and power shut off to the appliances under the hood automatically, tied to the suppression trigger, not a manual switch.
- Exhaust fan behavior is interlocked, typically continuing to run during discharge in most jurisdictions to help pull heat and chemical through the duct, per the suppression manufacturer's listing and local amendments.
- Makeup air and exhaust interlock together during normal operation, so one never runs without the other, and both tie to heat sensors that can trigger the suppression system if temperatures spike.
Inspectors will want a current suppression system inspection tag (typically semiannual under NFPA 96), a record of the interlock test, and documentation that the shutdown sequence was verified after installation, not just designed on paper.
Keeping the System Running: Maintenance and Performance Checks
A hood that was perfectly balanced at commissioning drifts out of spec within months if nobody's checking it. Filters need a visual check daily and a real cleaning weekly in high-volume kitchens, more often for heavy frying or charbroiling operations. Most manufacturers recommend replacing baffle filters when warping or heavy grease saturation shows up, generally somewhere in the one to two year range depending on cooking volume.
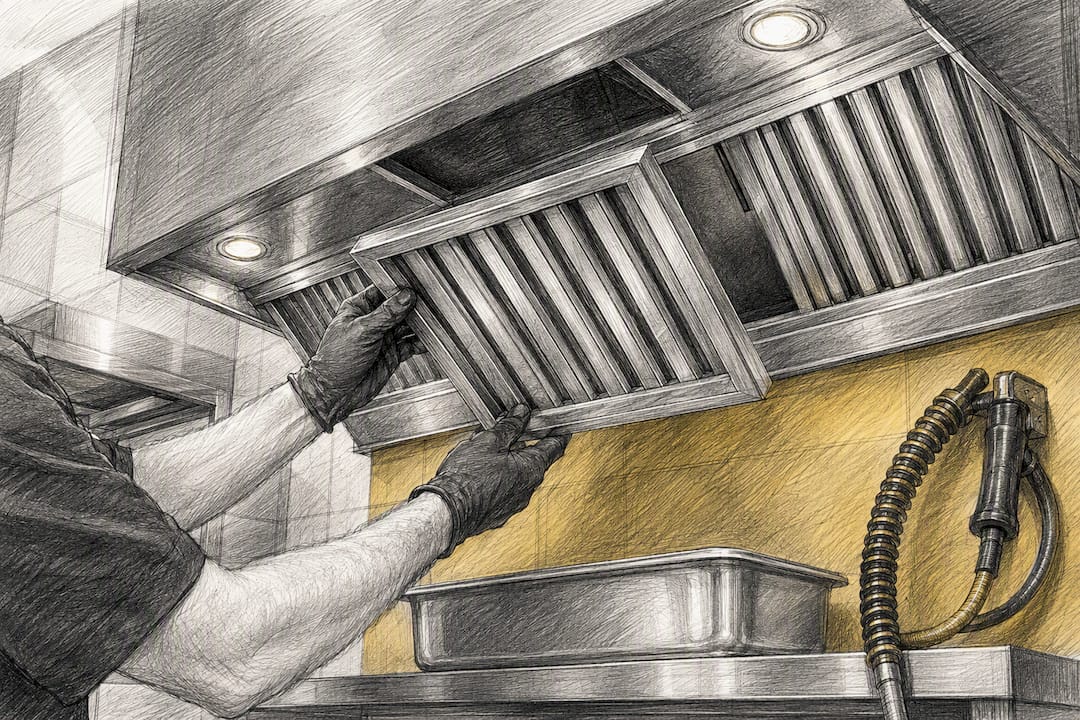
Duct and fan cleaning frequency depends on cooking volume and grease load, not a fixed calendar. NFPA 96 sets cleaning intervals based on cooking type, ranging from monthly for high-volume solid-fuel cooking to annually for lower-volume operations. Ask your cleaning contractor for before-and-after photos through the access panels, not just an invoice.
Capture and containment testing, essentially confirming the hood actually catches the plume under real cooking conditions, along with airflow verification against the original balance report, should happen annually at minimum.
Pro Tip: Keep every cleaning receipt, filter service log, and balance report in one binder near the kitchen manager's desk. Inspectors ask for this on the spot, and "we'll email it later" rarely goes over well.
Which Codes and Permit Documents Actually Matter?
Three references govern almost everything a plan reviewer will check: IMC sections 506 through 508 covering hoods, ducts, and makeup air; NFPA 96 governing fire protection and cleaning intervals; and UL 710 or UL 710B listings, which matter most when a self-contained listed cooking unit is being used in place of a conventional hood and duct system.
For permit submittal, expect reviewers to want a hood schedule with CFM and duty classification, grease-duct construction details, the suppression system specification, exhaust and MUA calculations, and a balance report tying it all together.
- Mismatched hood CFM between the mechanical drawing and the suppression shop drawing.
- Missing or incomplete grease-duct clearance documentation.
- No formal balance report submitted, or one that doesn't match as-built conditions.
A coordinated MEP/FP submittal, where the mechanical, fire protection, and architectural drawings all reference the same numbers, catches these mismatches before a reviewer does.
Bazini Engineering's Design Review Checklist
Bazini Engineering built its design review process around the failure points that most often delay a permit or trigger rework mid-construction:
- Confirm hood type matches actual appliance effluent, not just the appliance label.
- Verify grease-duct joint details and clearances against IMC and NFPA 96 minimums.
- Check roof termination heights and access panel spacing before duct concealment.
- Confirm suppression, exhaust, and MUA interlocks are wired to the design sequence.
- Require a balance report matching as-built conditions before final sign-off.
Most rework we see traces back to one of these five items getting skipped, not to exotic code interpretations.
Why Noise Control Matters as Much as Airflow
An undersized or poorly selected exhaust fan doesn't just move less air, it often runs louder, because contractors sometimes compensate for inadequate duct sizing by running the fan at higher static pressure than it was designed for. That extra strain shows up as noise, both in the kitchen and, if the fan sits on the roof above a dining room or a neighboring property, outside the building too.
Sound levels matter for two practical reasons. Kitchen staff working under a hood roaring at high decibels for an eight-hour shift experience real fatigue, and it becomes harder to hear fire alarms, timers, or a colleague calling out a hazard. Second, many municipalities have exterior noise ordinances that apply to rooftop equipment, and a fan that was fine on paper can become a code violation once a neighbor complains.
Selecting a fan with a favorable sound rating at your actual operating point, not just the cheapest unit that hits the CFM number, solves most of this before installation. Belt-driven fans generally run quieter than direct-drive units at comparable CFM, though they add a maintenance item (belt inspection and replacement) that facility teams need to track. Sound attenuators, essentially lined duct sections that dampen noise without restricting airflow, are a common retrofit fix when an existing fan turns out louder than expected after occupancy.
Vibration isolation matters too. A fan mounted directly to a curb without isolation pads transmits mechanical noise through the roof structure into occupied space below, something that's often overlooked until tenants start complaining.
Common Installation Pitfalls That Delay Occupancy
Installation problems tend to cluster around a handful of recurring mistakes, and most of them trace back to trades working from drawings that weren't fully coordinated before construction started.
Duct routing conflicts top the list. A grease duct designed on paper to run a straight path to the roof frequently runs into structural beams, other trade's ductwork, or plumbing risers once framing is actually up, forcing field changes that violate the original clearance calculations. Coordinating duct routing with structural and other MEP trades before permit submittal, not during rough-in, avoids most of this.
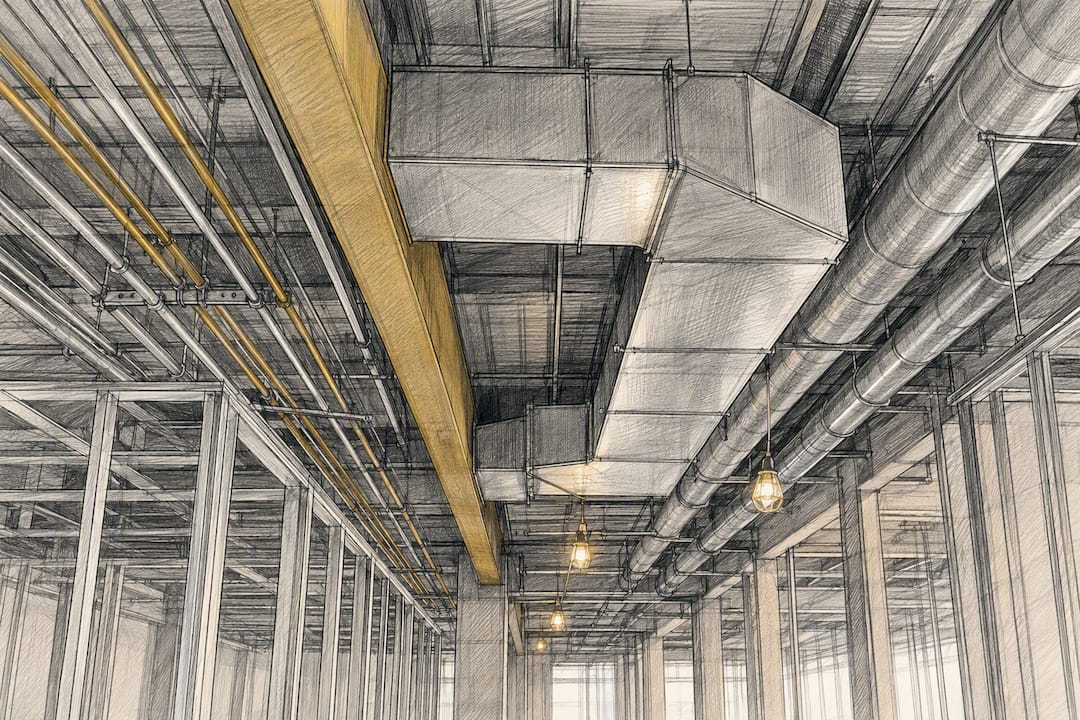
Undersized chases are a close second. Grease duct needs either fire-rated wrap or a minimum air clearance to combustibles, and both require more physical space than a lot of general contractors budget for in early framing. Finding out the chase is two inches too narrow after drywall is up is an expensive lesson.
Interlock wiring gets missed more often than you'd expect. Electrical and mechanical trades sometimes install their respective equipment correctly in isolation, but nobody verifies that the exhaust fan, MUA unit, and suppression system actually talk to each other until commissioning, sometimes not even then if nobody runs a full functional test.
Finally, hood-to-appliance alignment shifts during construction. Equipment gets value-engineered or substituted late in the project, and if nobody checks the new appliance's footprint against the hood's listed overlap requirements, you end up with a hood that no longer captures what it needs to. A quick equipment schedule review against the hood shop drawings before ordering catches this every time.
How Do You Verify a System Is Actually Balanced?
Air balancing is the step that confirms a system performs the way it was designed on paper, and it's the step most often skipped or rushed on a tight construction schedule. A certified air balance technician measures actual airflow at the hood, the MUA diffuser, and the exhaust fan discharge, then compares those readings against the design CFM from the engineer's calculations.
The process typically involves a pitot tube traverse or a capture hood at each grease filter to confirm total exhaust volume, followed by measurements at each MUA outlet to confirm makeup air is arriving where it's supposed to and at the right volume relative to exhaust. A properly balanced system keeps the kitchen at a slight negative pressure relative to the dining room, enough to prevent odors from migrating out, but not so negative that doors become hard to open or exterior air gets pulled in uncontrolled through gaps.
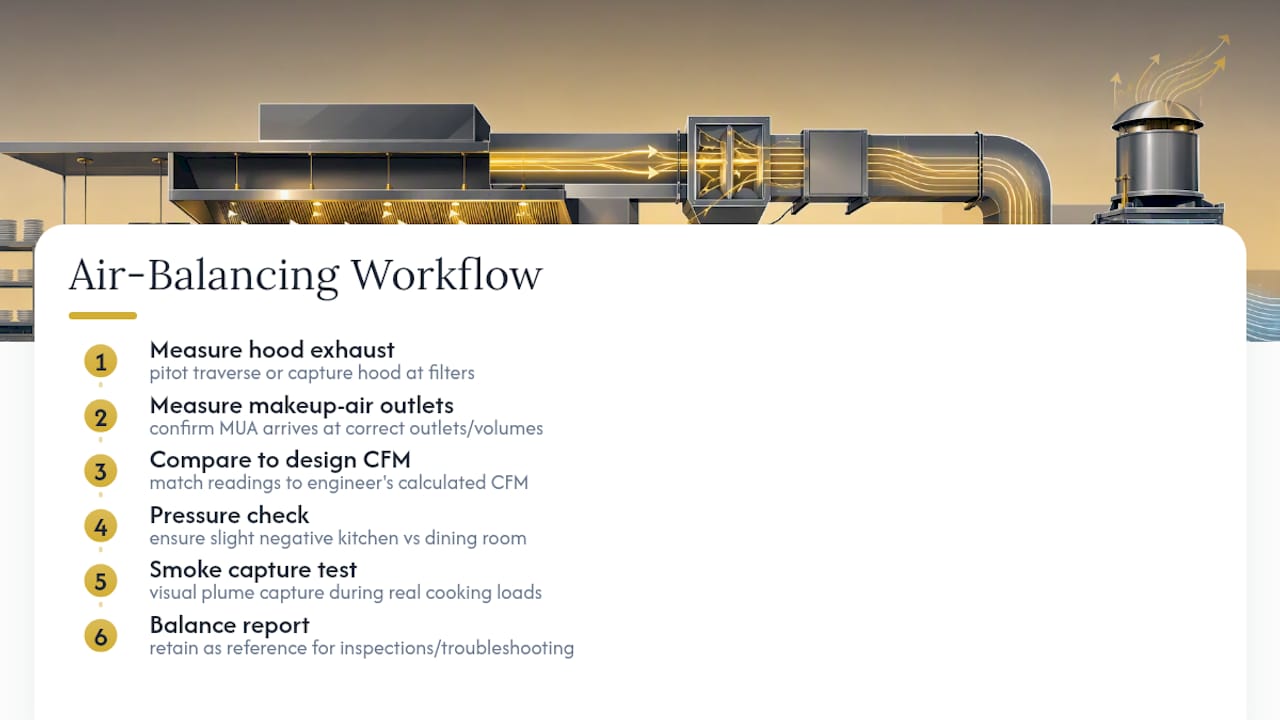
Smoke testing or a visual capture-and-containment check, watching whether the hood actually catches the plume from the appliances under it during real cooking loads, is a practical field test that complements the numeric balance. If smoke escapes past the hood's front edge during normal cooking, no balance report number fixes that. It's a hood sizing, positioning, or MUA delivery problem that needs a design correction.
The balance report itself becomes the reference document for every future inspection and troubleshooting call. When airflow complaints come up two years later, whoever services the system needs that original report to know what "correct" actually looks like for that specific kitchen.
Why Ventilation Effectiveness Is a Safety Issue, Not Just a Comfort One
Poor ventilation in a commercial kitchen creates layered risks that go well beyond an uncomfortable shift. OSHA guidance on heat exposure identifies commercial kitchens as environments where inadequate ventilation compounds heat stress risk for workers standing next to fryers, ranges, and ovens for hours at a stretch. Tempered makeup air isn't a comfort feature, it's a control measure for a recognized occupational hazard.
Grease and smoke that are not properly captured don't just create a hazy dining room. Airborne grease particulate settles on surfaces throughout the kitchen, creating slip hazards on floors and buildup on equipment that becomes harder to clean and more flammable over time. That's part of why restaurant and food-service fires remain a significant share of structure fires nationally: grease that migrates because a hood or duct isn't performing to spec is fuel waiting for an ignition source.
Indoor air quality has a direct line to staff retention and even customer experience. A kitchen that smells like yesterday's fry oil because the exhaust system isn't pulling correctly signals a maintenance gap that experienced kitchen staff notice immediately, and it's often one of the first things a health inspector's nose picks up on too.
Retrofitting an Older Kitchen Without Shutting It Down
Retrofitting ventilation in an occupied, operating kitchen is a different problem than designing one into new construction, and it comes with its own set of trade-offs. The building's existing structure, chase sizes, and roof penetrations were set decades ago, often before current code minimums existed, which means a retrofit frequently has to solve for constraints that didn't exist on the original design.
Phasing work around operating hours is usually the first challenge. Most retrofits happen overnight or during scheduled closures, which limits how much duct replacement or hood swapping can realistically happen in a single work session. Breaking the project into phases, tackling one hood or one section of duct at a time, keeps the kitchen partially operational but stretches the timeline and can complicate inspections if the system is only partially compliant mid-project.
Existing chases rarely accommodate modern duct sizing or clearance requirements. A duct sized for an old, lighter-duty appliance often can't handle the CFM a new charbroiler or high-output fryer needs, and the physical chase may be too small for a properly cleared or wrapped replacement duct. This sometimes forces a choice between an expensive structural modification or accepting a smaller appliance than the operator wants.
Retrofitting also creates a natural opportunity to add DCKV or grease-mitigation technology that wasn't standard when the original system went in. Because demand control ventilation reduces conditioned air losses by throttling exhaust during low-cooking periods, a retrofit that's already opening up ductwork and replacing fans often pays back the added DCKV cost faster than a standalone energy upgrade would on its own.
Documentation from the original installation is often missing or inaccurate for older kitchens, which means a retrofit frequently starts with an as-built survey rather than trusting decades-old drawings. Skipping that step is how a retrofit crew discovers mid-demolition that the existing duct doesn't match anything on file.
Prioritize the System, Not the Symptom
Owners often want to fix the loudest complaint, a smoky kitchen, a noisy fan, a failed inspection, without asking whether that symptom points to an undersized MUA path or a hood that was never right for the equipment under it. Spending capital on a full DCKV or grease-mitigation retrofit only makes sense once an engineering audit confirms the underlying system has the bones to support it; otherwise you're layering new equipment onto a design flaw.
Scope any audit to include actual field measurements against the original balance report, not just a visual inspection. That's what separates a reliable ROI estimate from a guess, and it's what keeps a retrofit from generating a fresh set of permit surprises.
— Joseph
Get an Engineering Review Before Your Next Permit Submittal
Most of the compliance headaches covered above, hood type mismatches, missing balance reports, interlock wiring nobody tested, share one root cause: the mechanical and fire protection design never got coordinated before construction started. Bazini Engineering closes that gap directly, handling mechanical and HVAC design, fire suppression engineering, and permit expediting with the NYC Department of Buildings and FDNY as one coordinated scope, so the hood schedule, duct details, and suppression spec all reference the same numbers before a reviewer ever sees them.

A first engagement typically starts with a site visit to document existing conditions, followed by a scope defining what the project needs (new hood design, retrofit review, balance report coordination, or full permit filing), then a set of stamped drawings and calculations sized to your actual appliance lineup and duty class. If you're planning new construction, a menu change that shifts appliance duty class, or you just want a second set of eyes on a contractor's proposal before signing it, request a design review from Bazini Engineering's services page and get a scoped timeline back before you commit to a contractor.